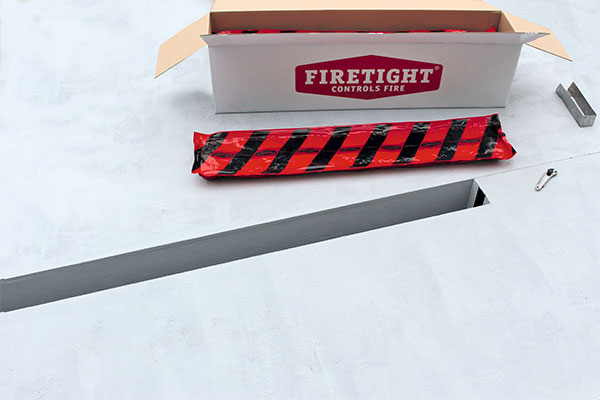
HOW IS FIRETIGHT® INSTALLED?
FAST AND EASY INSTALLATION.
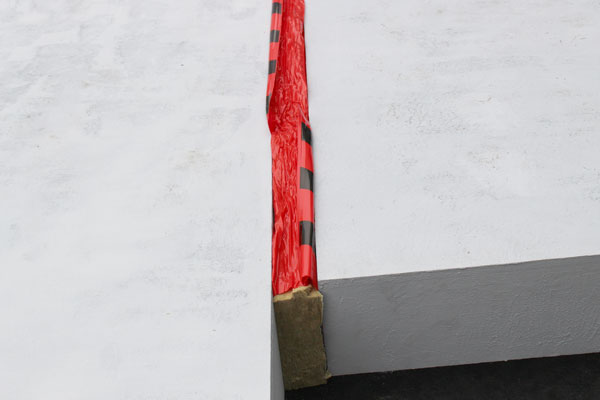
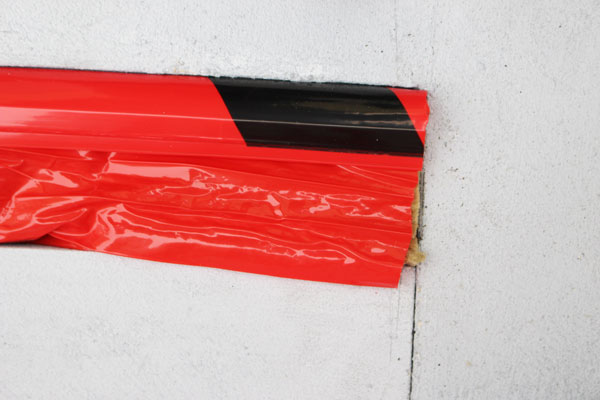
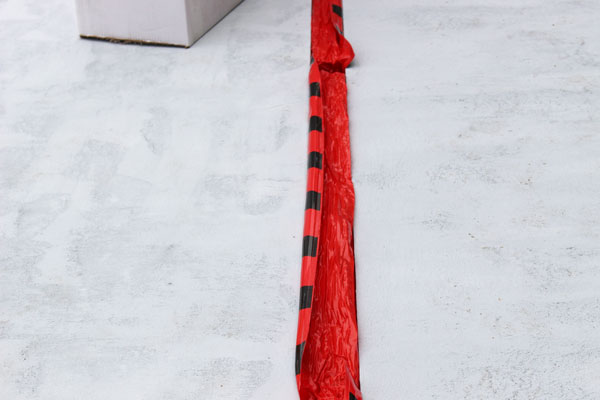
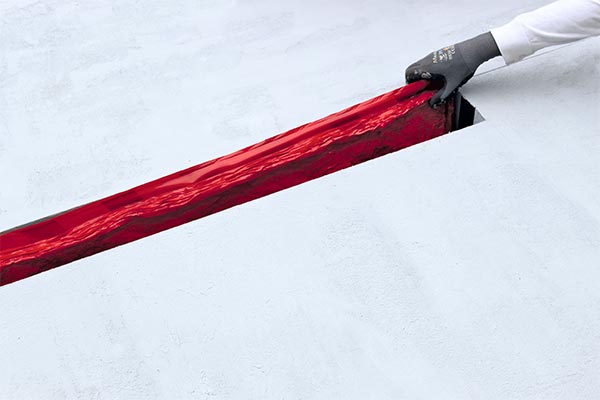
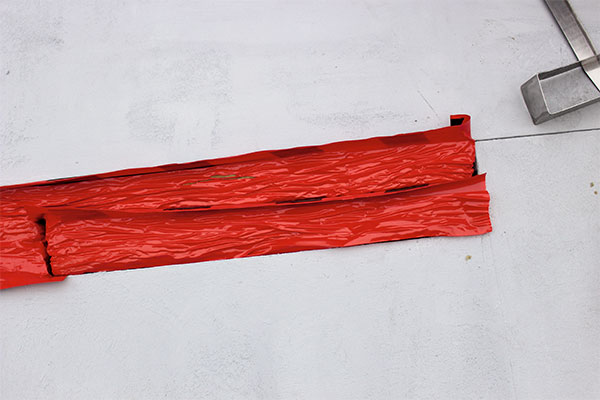
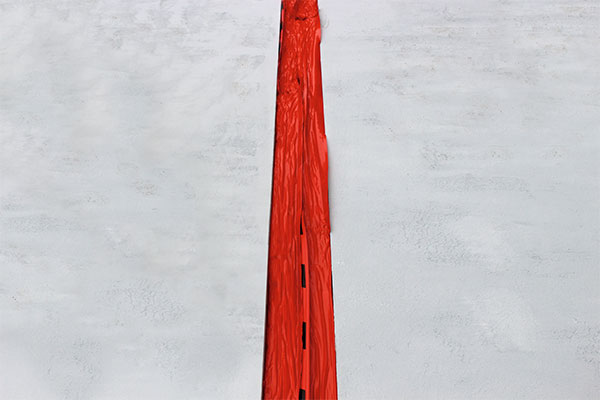
FIRETIGH Fire stop for a fire safe and thermal barrier in facade systems. FIRETIGHT® is placed entirely in the joint. After puncture, the high density mineral wool recuperates immediately and completely fills the cavity. Due to the excess, FIRETIGHT® remains in place without additional measures, with the intumescent layer being positioned correctly at the same time. The film remains in the seam and seals it in an airtight manner. FIRETIGHT® products can easily be placed in a row to fill the complete length of the joint.
On this page you will find the complete installation instructions.
Looking for package instructions of the FIRETIGHT WSW or FIRETIGHT FUSE?

STEP 1
Define needs
| JOINT WIDTH | APPLICATION |
|---|---|
| 40 – 90 mm | SINGLE FIRETIGHT® |
| 90 – 160 mm | DOUBLE FIRETIGHT® |
For a good fire protection, the thickness of the product is 1,5x the width of the joint or seam. Check if the width of the joint and the thickness of the FIRETIGHT® are according to advised guidelines before use. When the guidelines are followed, the FIRETIGHT® does not need additional support for a permanent placement.
Based on the joinwidth of your project, FIRETIGHT® must be placed in a single or double manner (see the table above).
STEP 2
PLACE FIRETIGHT®
SINGLE FIRETIGHT®
In the case of an open seam, the FIRETIGHT® is simply
positioned at the end.

STEP 3
Activate FIRETIGHT®
SINGLE FIRETIGHT®
STEP 4
Continue installation
SINGLE FIRETIGHT®

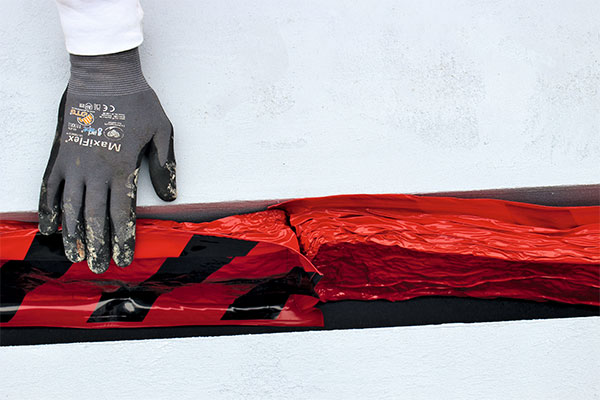
Continue working like this until it is clear that, with the next
FIRETIGHT®, the seam is completely filled (see image 6).


STEP 5
Install end cap
SINGLE FIRETIGHT®
intumescent tape should be applied before the last
FIRETIGHT® is placed.
- Cut off a piece of intumescent adhesive tape to size
and stick it on the closed end (see image 7).
Now place the last FIRETIGHT®:
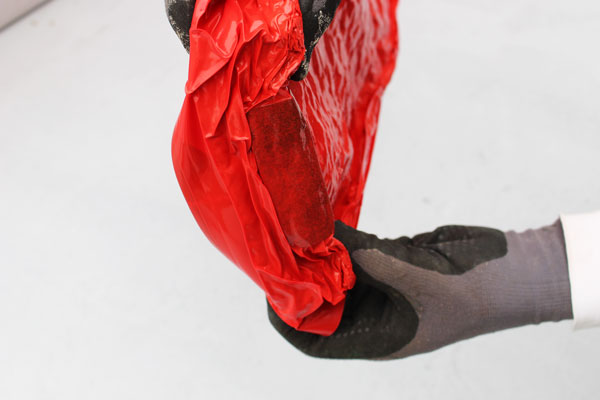
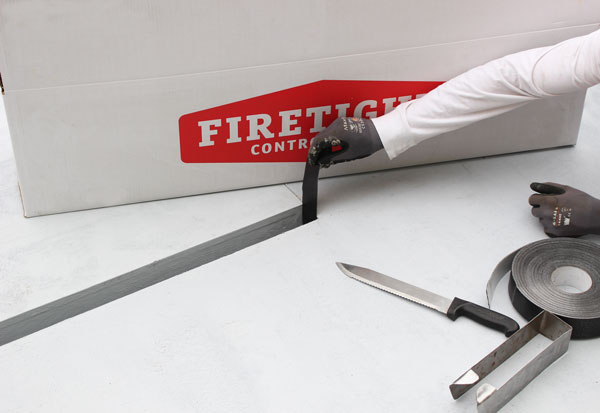
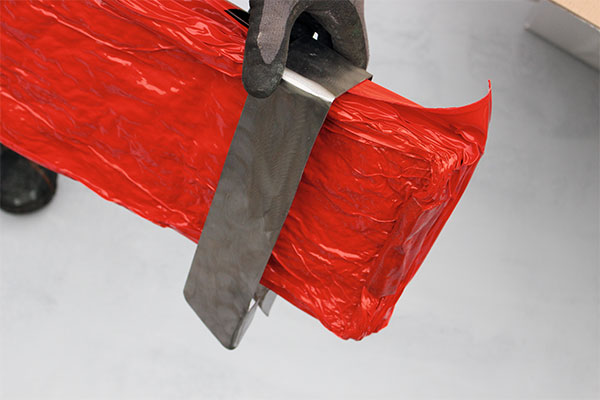
- Measure the remaining seam to be filled and determine the length of the remainder (use the FIRETIGHT®clamp if necessary) (see image 8).
- Mark the FIRETIGHT®;
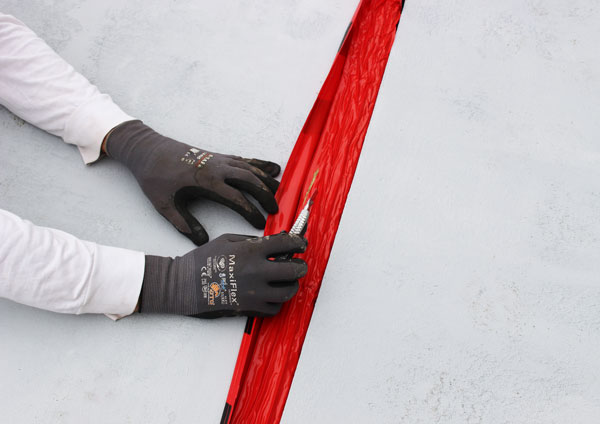
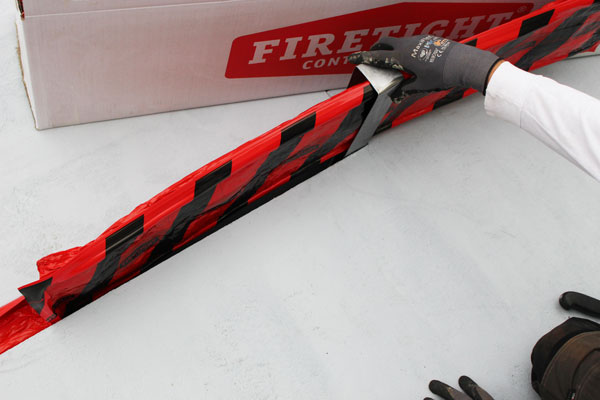
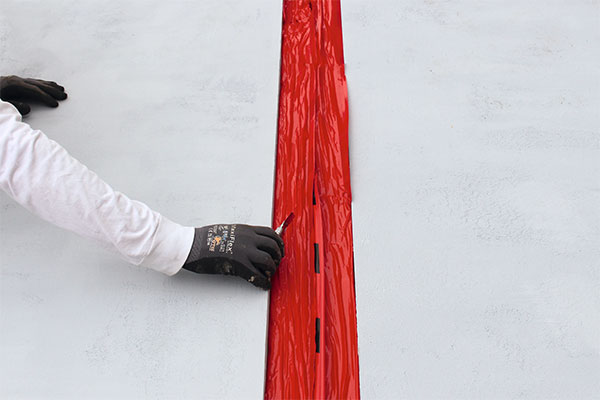
- The FIRETIGHT® is then inserted into the seam at an angle and cut to size with a sharp knife (see image 9). When you are cutting, the mineral wool will immediately recuperate, which is why the FIRETIGHT® must be at least partially placed in the seam before commencing with cutting. The film allows the FIRETIGHT® to be slid into place in the seam. The cut edge has to be placed
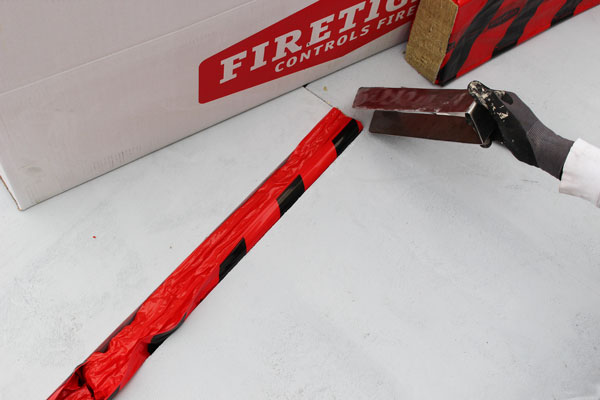
against the short closed end of the already applied intumescent band. After the FIRETIGHT® has completely recuperated, remove the Firetight clamp (see images 10 through 12).
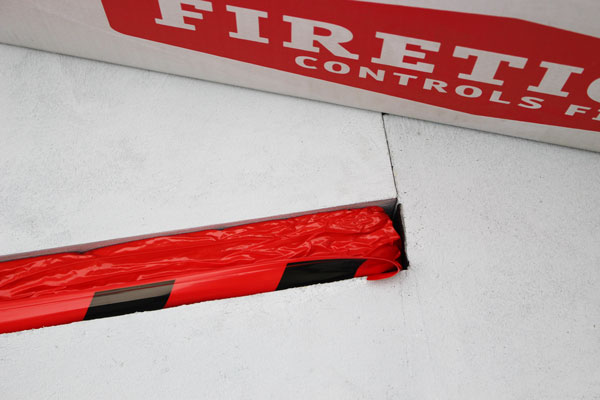
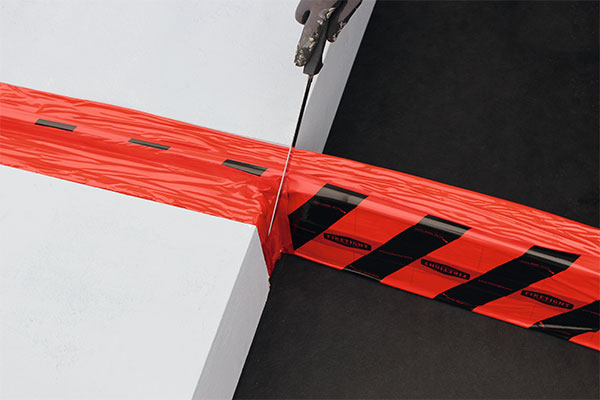
If the seam does not have a definite end but ends in free space, the part of the FIRETIGHT® which sticks out can be easily cut off (see image 13).
PROTECTED
SINGLE FIRETIGHT®
Find out more about all advantages of the FIRETIGHT®.
INSTRUCTIONS FOR DOUBLE FIRETIGHT®
Below you’ll find a detailed description of the installation for the double FIRETIGHT®.
STEP 2
PLACE FIRETIGHT®
DOUBLE FIRETIGHT®
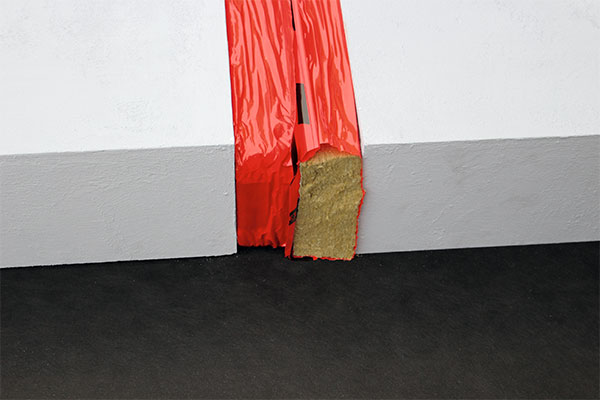
It is possible the seam is closed on the end(s). If this is the case, please apply a self-adhesive intumescent tape to the inside of the end of the seam. Cut a piece of the self-adhesive intumescent tape to size and stick this to the short end of the seam (see image 1).
The FIRETIGHT® strips should be placed in the seam in an alternating fashion.

The two FIRETIGHT®s are now laying end-to-end in an alternating fashion (see image 4). Hold this FIRETIGHT® in place in the seam with your hand.
Now place the third FIRETIGHT® on the opposite side against the first and second FIRETIGHT® in the pattern as shown in the illustration. The third FIRETIGHT® is now halfway between the first and second FIRETIGHT® (see image 5).
If the seam is not closed, the FIRETIGHT® is simply positioned at the end, also see step 6.
STEP 3
Activate FIRETIGHT®
DOUBLE FIRETIGHT®
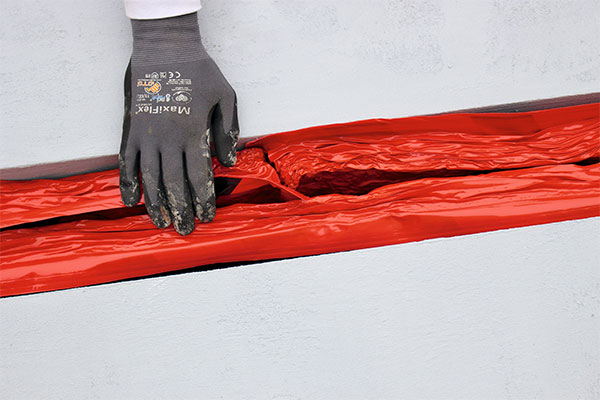
The mineral wool recuperates and clamps itself in the seam (see image 6). At this stage, leave the first and second FIRETIGHT® intact for a while. The position of these FIRETIGHT®s can still be easily adjusted so that the strips can be properly connected to each other.
STEP 4
Install end cap on closed end
DOUBLE FIRETIGHT®
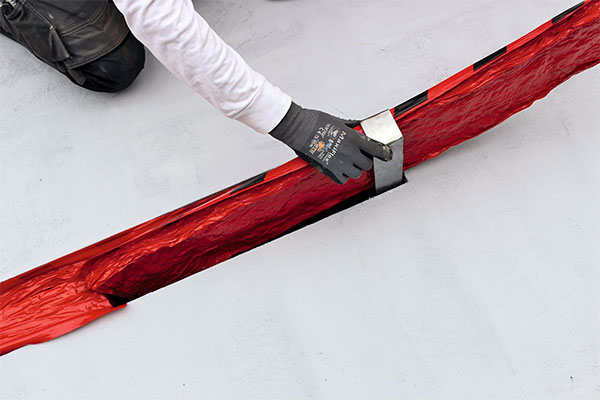
- Slide the Firetight clamp over the FIRETIGHT® with the open bottom underneath (see image 7).
- Measure the length of the remainder and mark the FIRETIGHT® (see image 8).
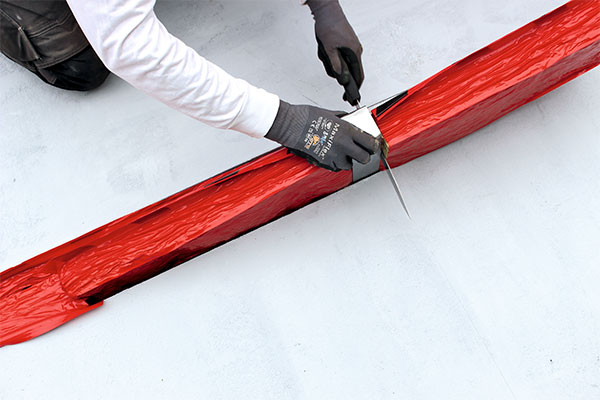
- The FIRETIGHT® is then inserted into the seam at an angle and cut to size with a sharp knife (see image 9). When you are cutting, the mineral wool will immediately recuperate, which is why the FIRETIGHT® must be at least partially placed in the seam before you commence with cutting. The film allows the FIRETIGHT® to be slid into place in the seam. The cut edge has to be placed against the short end of the already applied intumescent band.
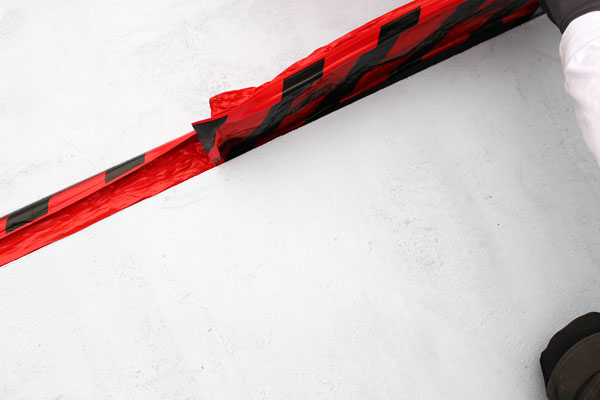
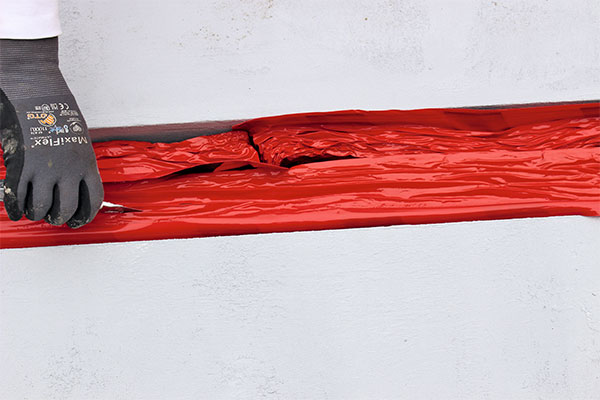
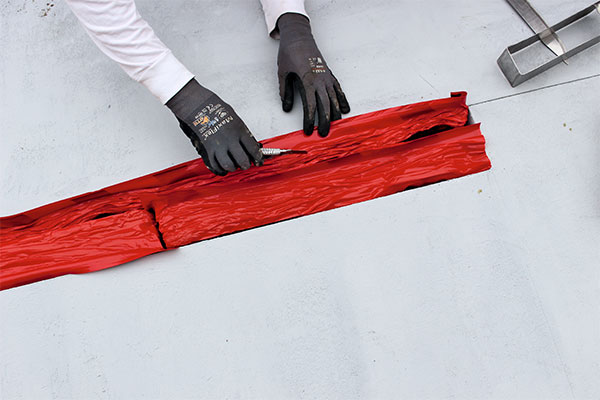
- After the cut-to-size FIRETIGHT® has completely recuperated, remove the FIRETIGHT®clamp. The first FIRETIGHT® can now be activated by cutting through the foil (see image 10). The FIRETIGHT®s wil now fill the entire seam and connect well to each other on the short sides (see image 11).
STEP 5
Continue installation
DOUBLE FIRETIGHT®
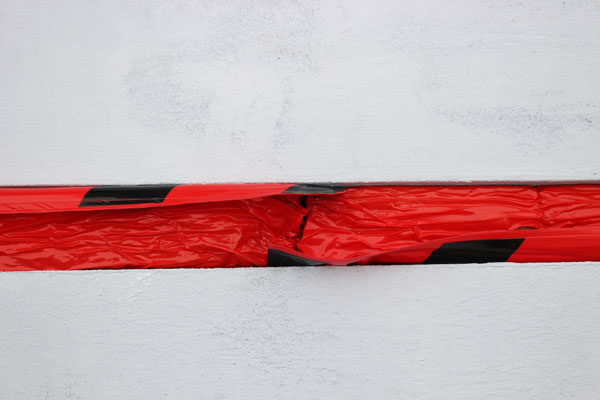
This FIRETIGHT® can now be recuperated by cutting into the foil. Continue until the entire seam is filled (see image 12).
In the case of a closed end, repeat step 4. Proceed with step 6 in the case of an open end.
STEP 6
Install end cap on open end
DOUBLE FIRETIGHT®
Protected
DOUBLE FIRETIGHT®
CONTACT US FOR MORE INFO
Installing FIRETIGHT® is easy, but some situations ask for extra attention. Ask your question or download our instruction manual.
'S-GRAVELANDSEWEG 246
3125 BK SCHIEDAM THE NETHERLANDS
+31(0)10 – 30 20 200
verkoop@alertisolatie.nl
© ALERT INSULATION 2024, All right reserved